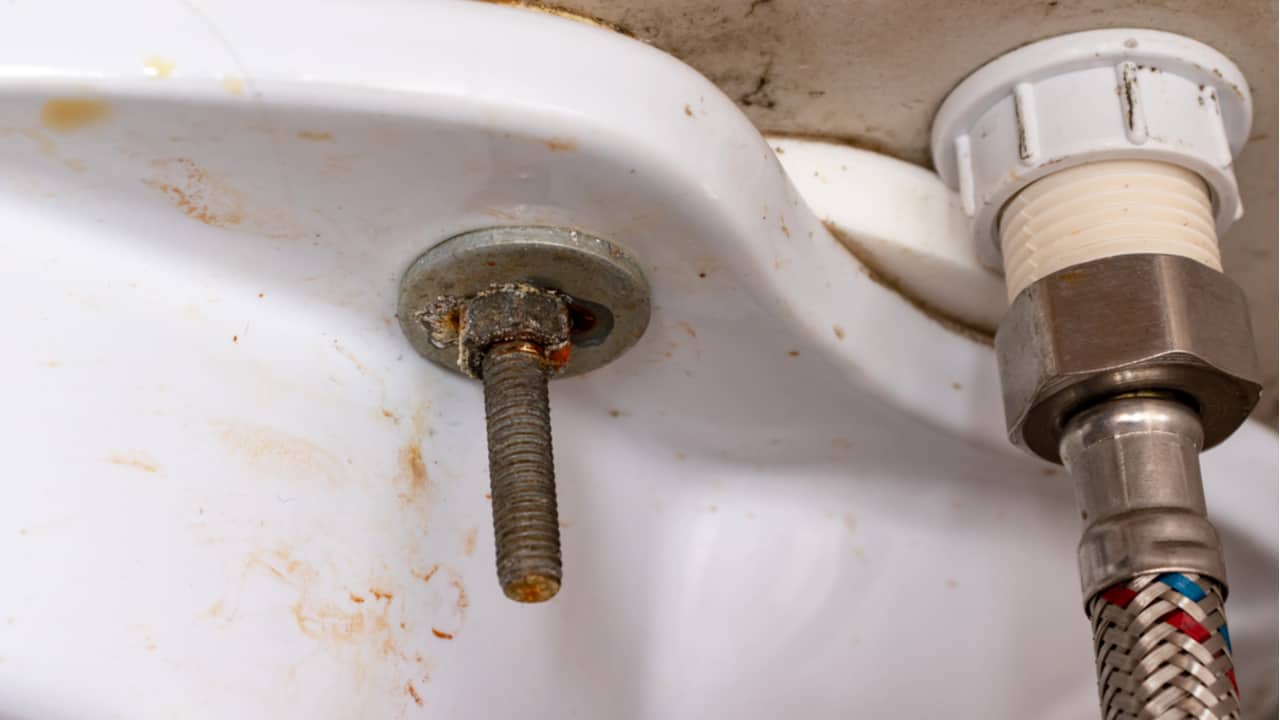
A broken, misplaced, or damaged tank fastener will most likely cause a toilet to leak. While the bolts may have simply been put on too firmly, this is less likely.
You should never want to save money on your water bill by sacrificing water quality, so be sure that you don’t have a leaky toilet. If you discover a toilet tank bolt leak, how do you fix it?
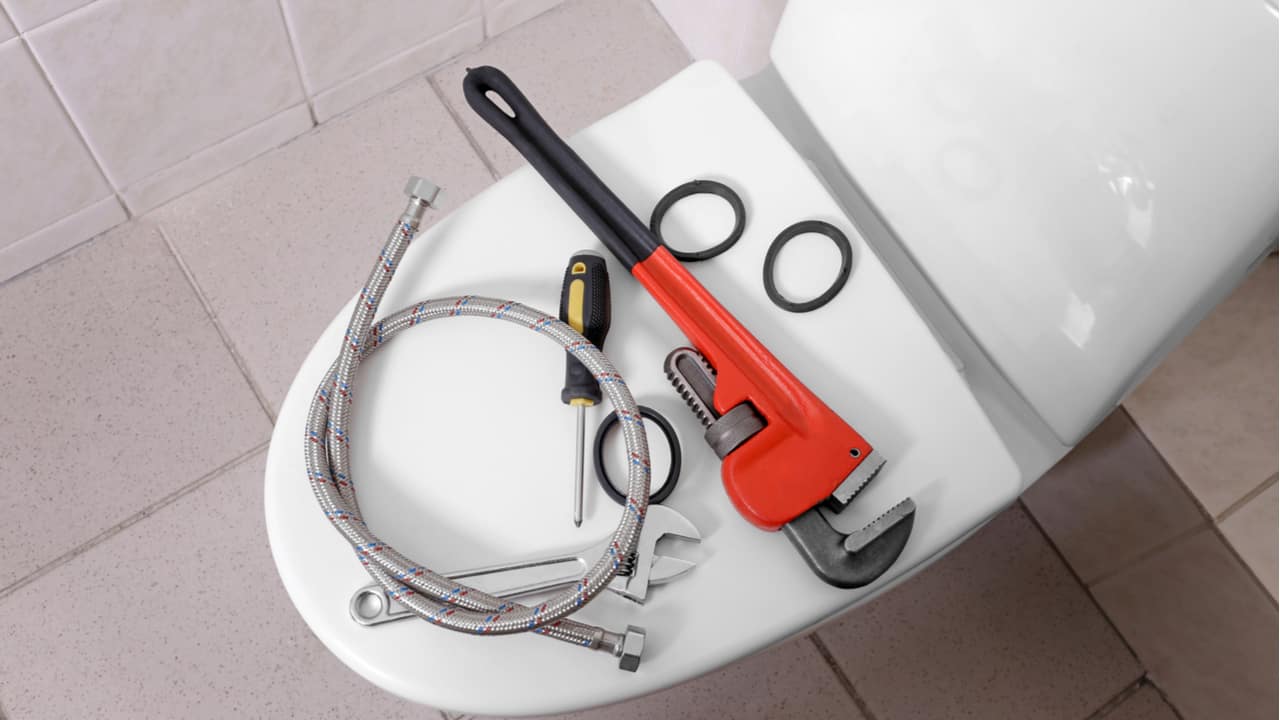
If you have a toilet that leaks from tank bolts, follow these steps:
Contents
Step-by-Step Guide on How to Repair a Toilet Leaking from the Tank Bolts
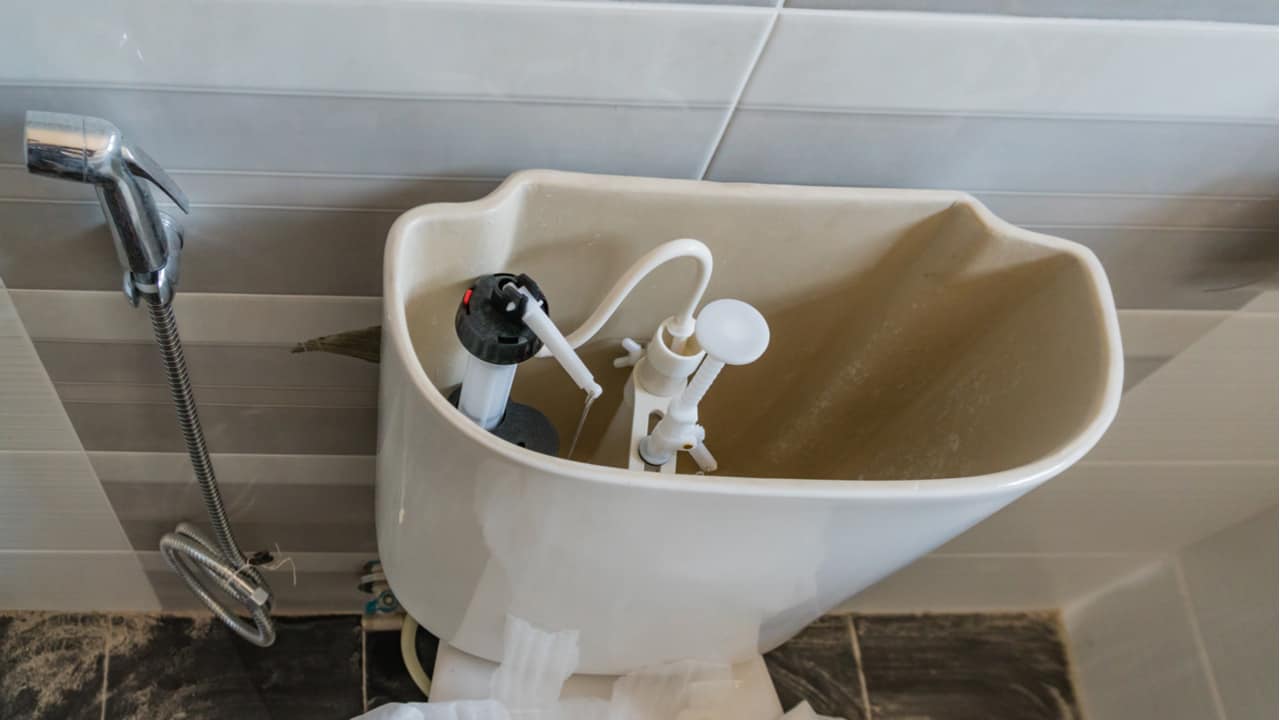
When it comes to the design of a toilet, a toilet that uses bolts that go through the tank and attach the toilet to the bowl is quite typical. One of two things is resting between the toilet tank and the bolt head: a rubber or a metal washer.
In addition, these washers may also be used to sit between the bowl and the tank. To do this, they are locked in place to secure the two while preventing the latter from moving.
Metal utensils are more susceptible to corrosion if used in harsh water.
Perform an Inspection To Find the Leak Source
You must first locate the leak by thoroughly inspecting the toilet tank bolts.
Is it noticeable that the bolts are loose?
Do they have corrosion? It’s a must to replace the current ones if this is the case.
And in the same way, the washers and nuts that keep the bolts in place are also involved. Bolts on the tank’s tank seal might become loose with time, potentially putting the tank at risk. This may corrode more quickly than usual in a bathroom that tends to be on the more humid side.
Notably, your toilet can leak in other locations as well. To thoroughly check a toilet, begin with the floor, located at the bottom of the bowl.
Is there any standing water around?
To follow, start from the bottom of the toilet and move upwards. Look between the two areas, and you should be able to spot the source of the leak.
Turn Off the Water and Empty the Toilet Tank
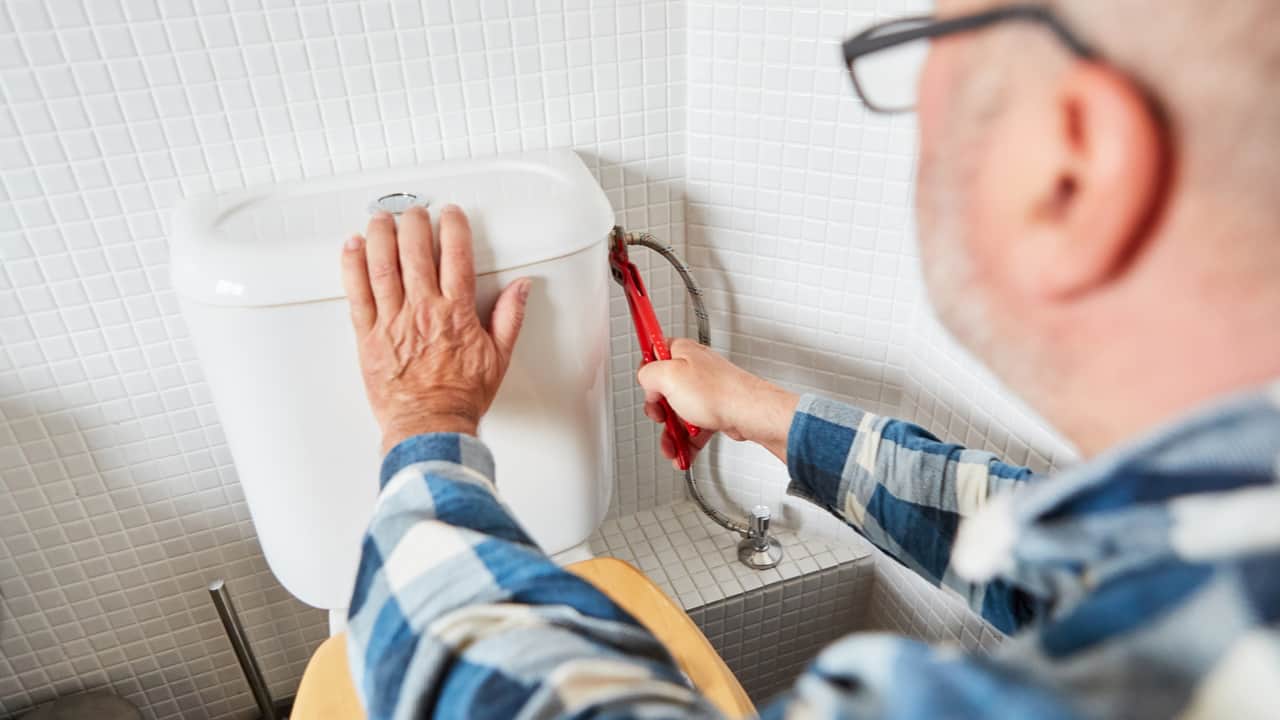
Once you have found the leak, you should turn off the water supply line to the sink before proceeding. Water supply valves in toilets are generally situated on the left side and are accessible via the wall behind the toilet.
To loosen the nut on the valve, use an adjustable wrench. Once the valve has been turned a half-inch counterclockwise, then turn it back to the closed position.
You will need to turn the valve a bit more if the toilet is still running. Next, flush the toilet to drain all of the water from the bowl after turning off the water supply line. Then, finally, drain the tank completely. If you have a slow flushing toilet, you might need to sort that out as well.
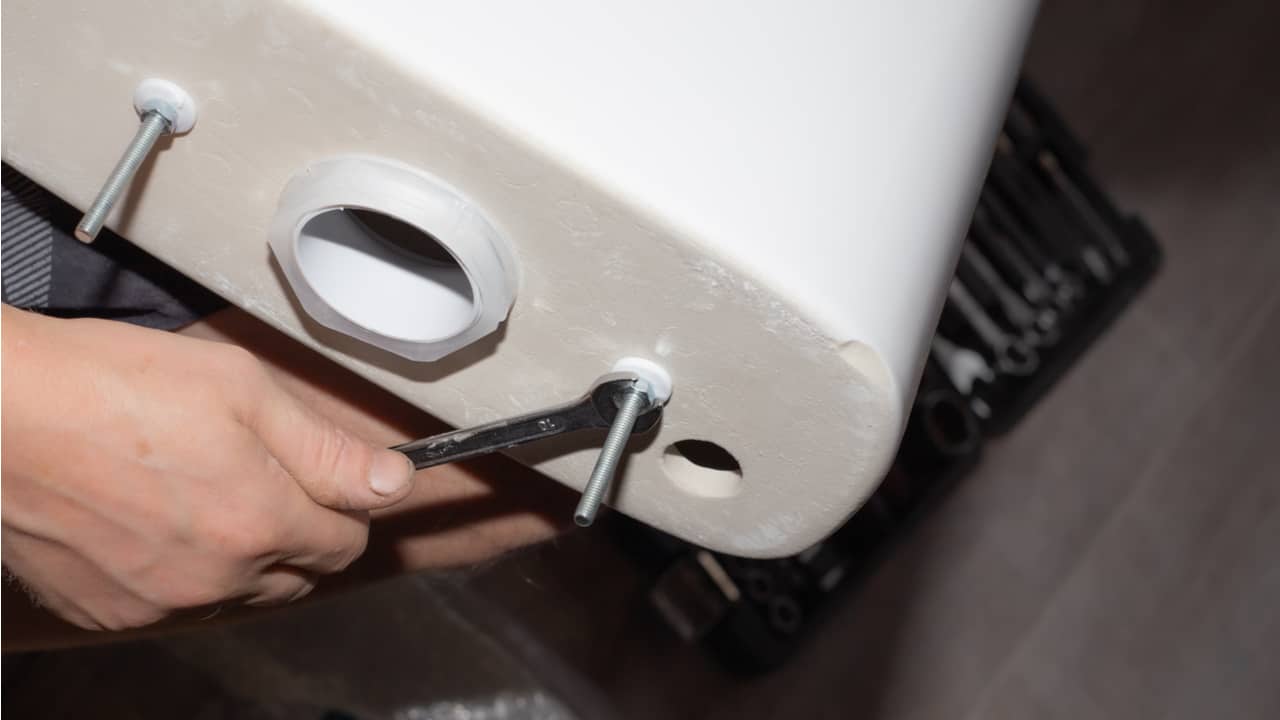
Take Out the Toilet Bolts and the Tank

Toilet tanks contain water; once they have all been drained, you should use a wrench to unscrew the bolts that link the tank to the toilet bowl.
Also, remember that these nuts should not be fixed too firmly. If they are badly corroded, however, you won’t be able to turn them by hand.
In this situation, you should grasp the nut or bolt head firmly with your pliers and very gently move it to the left. In addition, you may need to tap the end of the pliers on the pipe a few times to break up the rusted metal.
If you still have issues, sprinkle some CLR over the fastener and let it sit for a few minutes before continuing. Allow it to sit for a while, and then give it another go.
Make sure the toilet lid is down, and then pull the tank out of place after the tank bolts have been loosened. To that end, lay it on top of the toilet lid to get started.
Fasteners and bowl gaskets are removed and replaced as needed.
Make careful to set all of the old hardware aside before using the new bolts or screws.
For most toilets, the bowl gasket — a circular piece of rubber between the tank and the bowl — should also be removed.
While this is commonly associated with toilets around seven to ten years old, rubber gaskets are also reported to produce water leaks as they deteriorate or harden. If your toilet is too old, check out our post on what to do with an old broken toilet.
Next, inspect the packaging materials (such as the Fluidmaster kit) that came with your new hardware or tank kit, and make sure you have all the required components to prevent losing them. Additionally, the set of nuts, metal washers, or rubber washers might be provided as a safety precaution.
Once you’ve found the places where the bolts go, make sure they are correctly positioned on the tank. Before proceeding to the following step, install the gasket on the bottom of the tank.
For more help, read this post on toilet tank parts.
Return the Toilet Tank to Its Original Position
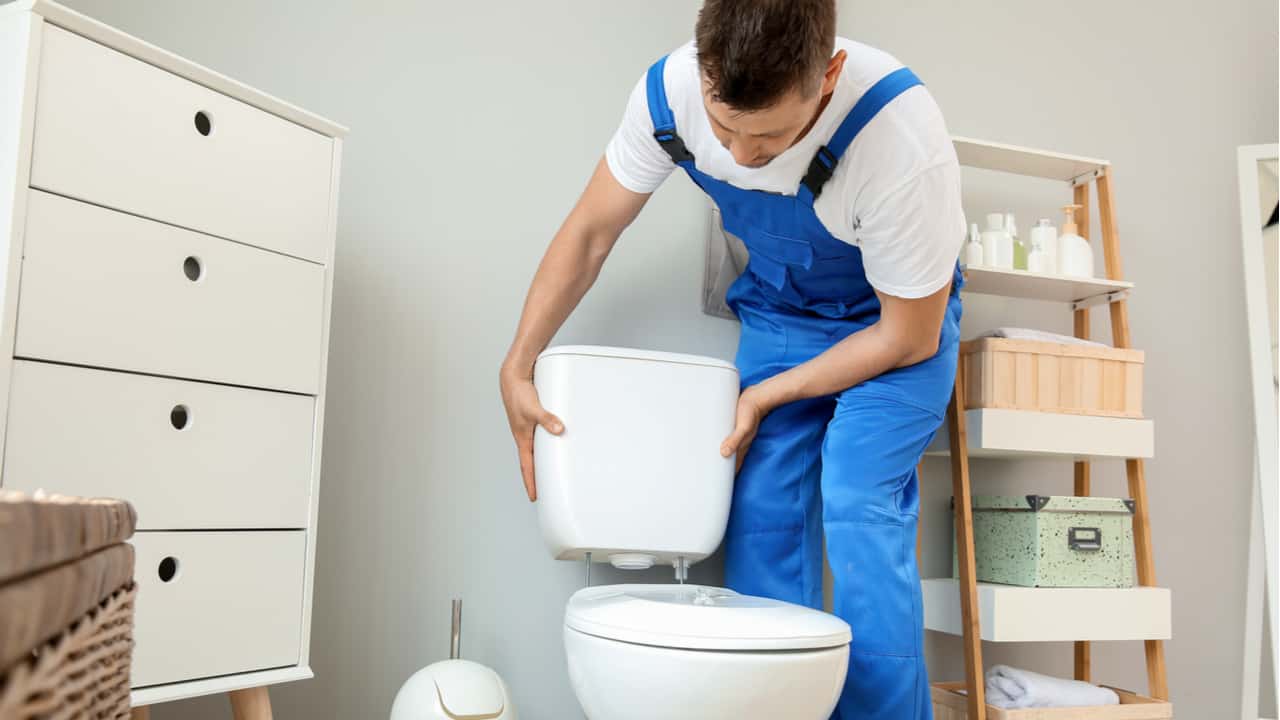
The tank may now be safely and gently lifted from the toilet lid and returned to its location. To do this, put your nuts and washers in place and then secure the bolts with them.
To avoid over-tightening, be sure to watch out for it! Do not use this toilet until you have replaced the bowl or tank.
Also, remember to perform a quick check to ensure that you have all the bolts and nuts, and washers put on the tank before going on.
To complete this process, turn the water valve back on and check whether the leak is gone.
Apply the adjustable wrench to turn the water valve counterclockwise and apply steady but slight pressure to hand tighten it. Now, use your nose to search for any leaks in the toilet tank.
It is essential to double-check the inside and outside of the bowl and the bottom of the bowl. It is simply to be on the safe side, so have a seat on the loo and keep an eye on the toilet while it is filling.
Another thing to watch out for is checking the area surrounding the primary water connection to make sure no leaks pop up and that your repair has been successful.
Check out this guide if your toilet tank is not filling properly after you have installed it. This other post should help you out if your toilet keeps running.
Conclusion
You now know how to fix a leaky toilet because of bolt difficulties. To avoid such issues in the future, consider getting a one-piece toilet. Check out this One Piece vs Two Piece Toilet comparison for more information.
Were all of the steps in the procedure comprehensible? Do you believe you’re ready to take on the challenge by yourself? The process may take 30 minutes to an hour or a bit less. It’s a good idea to seek some assistance from a qualified plumber if you run into a problem or stall because many plumbers can do a phone consultation for a modest charge these days.
And, while you are at it, you might want to do something about that unsightly toilet ring. Check out my post on How to Get Rid of Toilet Ring.